CPRog Examples
This page shows some example programs for the CPRog software. Please get in contact if you application is not covered...
Matrix Motion
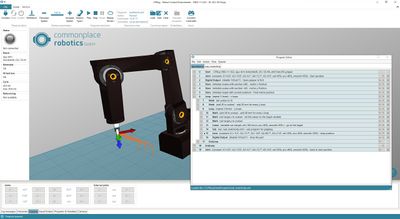
In order to grip work pieces form a rectangular tray it one has to control the robot so that it moves a new position and then operates the gripper. The motions have to be carried out multiple times for multiple items on the matrix. To simplify setting up such a motion, CPRog can handle loops and subprograms. In this case once would program two loops: one that increment the x and y of the target position and a second loop that controls the gripping motion. Here some example code that accomplishes this task:
Program Files:
Download the following xml files (right click, save as):
- The main program testMatrix.xml
<?xml version="1.0" encoding="utf-8"?>
<!-- values in mm and degree -->
<Program>
	<Header ProgramName ="CPRog recording" Author="nn" SetUpDate="" LastChangeDate="" Kinematic="CPRFour"/>
<Joint Nr="0" a1="0" a2="10.86" a3="6.14" a4="72.69" a5="0" a6="0" e1="0" e2="0" e3="0" velPercent="50" acc="40" smooth="50" AbortCondition="false" Descr="Start position" />
<Output Nr="1" Channel="DOut21" State="False" Descr="Open gripper at first" />
<Store Nr="2" Type="number" Name="xvalue" Value="240" Descr="matrix x Posiiton" />
<Store Nr="3" Type="number" Name="yvalue" Value="-60" Descr="matrix y Position" />
<Store Nr="4" Type="position" Name="target" Value="current" Descr="Final matrix position" />
<Loop Nr="5" Mode="Count" Times="3" Descr="x loops" />
<MathOperator Nr="6" Function="Set" FirstOperand="yvalue" SecondOperand="0" Descr="" />
<MathOperator Nr="7" Function="Add" FirstOperand="xvalue" SecondOperand="20" Descr="add 20 mm for every y loop" />
<Loop Nr="8" Mode="Count" Times="3" Descr="y loops" />
<MathOperator Nr="9" Function="Add" FirstOperand="yvalue" SecondOperand="40" Descr="add 40 mm for every x loop" />
<MathOperator Nr="10" Function="Set" FirstOperand="target.x" SecondOperand="xvalue" Descr="set the values to the target variable" />
<MathOperator Nr="11" Function="Set" FirstOperand="target.y" SecondOperand="yvalue" Descr="" />
<Linear Nr="12" Source="Variable" VariableName="target" vel="100" acc="40" smooth="50" AbortCondition="false" Descr="go to the target" />
<Sub Nr="13" File="sub_matrixGrip.xml" Descr="sub program for gripping" />
<Joint Nr="14" a1="-9.28" a2="13.67" a3="-4.92" a4="80.74" a5="21.8" a6="0" e1="0" e2="0" e3="0" velPercent="50" acc="40" smooth="50" AbortCondition="false" Descr="drop position" />
<Output Nr="15" Channel="DOut21" State="False" Descr="drop the part" />
<EndLoop />
<EndLoop />
<Joint Nr="16" a1="0" a2="10.86" a3="6.14" a4="72.69" a5="0" a6="0" e1="0" e2="0" e3="0" velPercent="50" acc="40" smooth="50" AbortCondition="false" Descr="back to start position" />
</Program>- The gripping sub program sub_matrixGrip.xml
Please save both files in the C:\CPRog\Data\Programs folder.
Always first test any program in a simulation, i.e. with the robot disconnected in software. The starting positions of the example code may have to be adapted to your specific set up!
Please refer to the command reference for further information on the commands and variables: Command Reference
Troubleshooting:
- If the robot does not perform the complete pattern, please check if the motion might exceed the motion limits. This is shown in the log messages tab on the bottom of CPRog.
- Take a look at the variables in the "variables" tab on the bottom of CPRog. This often helps to find problems.
- Precision: If the real robot approaches the positions with offsets it might be necessary to perform a fine calibration. Please have a look at the according page Define the zero position offsets or get in contact!
For questions please get in contact
