Difference between revisions of "USB-CAN connection to Robolink DCi"
From Wiki
| Line 9: | Line 9: | ||
# Connect the USB to CAN adapter to the PC and the D-Sub port of the DCi Robot. | # Connect the USB to CAN adapter to the PC and the D-Sub port of the DCi Robot. | ||
# Once an electrical connection has been made between the DCi robot, switch i9t on and wait until the green LEDs at the back of the robot start blinking. | # Once an electrical connection has been made between the DCi robot, switch i9t on and wait until the green LEDs at the back of the robot start blinking. | ||
| − | # Download [[ModuleCtrl | + | # Download [[Config_Software_ModuleCtrl|ModuleCtrl]] and start the executable. |
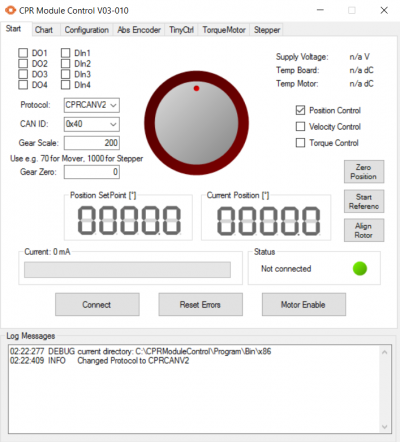
| − | # Connect | + | # Select 0x10 as board ID and click "Connect". [[File:ModuleCtrl StartPage.PNG|400px|thumb|Start tab in ModuleCtrl]] |
Revision as of 13:42, 21 January 2019
This guide applies to DCi Robots shipped from 2019.
In rare cases it may be necessary to connect a Windows PC directly to the DCI electronics by-opassing the embedded Linux computer inside the DCi Robot.
To do that, this USB-CAN adapter is required. is required: [1]
- Install the PCAN driver available in the link above.
- Connect the USB to CAN adapter to the PC and the D-Sub port of the DCi Robot.
- Once an electrical connection has been made between the DCi robot, switch i9t on and wait until the green LEDs at the back of the robot start blinking.
- Download ModuleCtrl and start the executable.
- Select 0x10 as board ID and click "Connect".
