Axis Firmware Update
Each axis runs firmware to control one axis. Occasionally firmware updates are released to improve performance, solve issues or add features. This article guides you through the firmware update.
Currently firmware updates are only available for BLDC controllers, e.g. Rebel joints.
Do not confuse the axis firmware with the embedded robot control software. You can find updates for it in Software Updates. You do not need to update the firmware to update the embedded robot control.
You should only update the firmware as last resort in case of hardware issues since a failed update (e.g. due to power loss) can make the robot unusable. In case of hardware issues check the firmware parameters before considering an update or contact support.
The update will take roughly 3-4 minutes per axis but you can select which axes to update.
Install Module Control
The firmware update is done using ModuleCtrl ClosedLoop. Download and execute the most recent installer to get the newest firmware files onto your PC. Note that there also is an OpenLoop version that does not support firmware updates.
Warning: ModuleCtrl is a configuration and testing tool, do not click buttons or enter values unless you know what you are doing. The robot may move unexpectedly or change motion configuration and stop to work correctly.
Connect to the robot
- Close and disconnect all other applications that connect to the robot, e.g. iRC and PLCs.
- Press the emergency stop of the robot to prevent accidental motion.
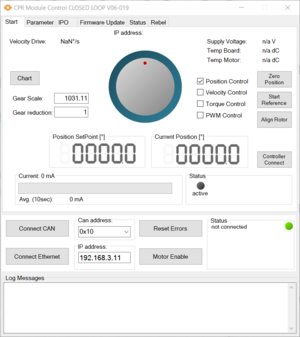
- Start ModuleCtrl ClosedLoop.
- Find the "Can address" entry next to the Connect buttons at the bottom. Enter the CAN address of the axis to update (or one of the axes if you want to update multiple). Generally A1 is 0x10, A2 is 0x20 etc. A6 of Rebel joints is 0x60 while A6 of DIN rail modules is 0x58.
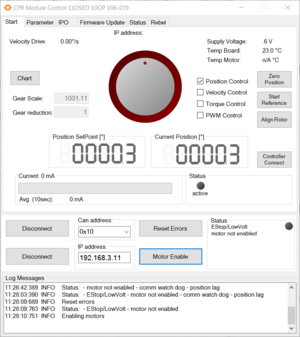
- Click "Connect Ethernet". The text in the "Status" box at the bottom right side should no longer show "not connected".
- To test the connection click "Reset Errors". The status should change and say something like "EStop/LowVolt motor not enabled", but it may also show other errors.
If the status box shows "not connected" or "dead" the update will not work. Please contact support.
Prepare the update
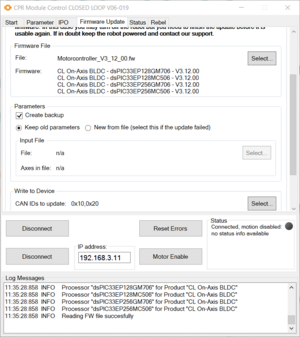
- Open the "Firmware Update" tab at the top of ModuleCtrl ClosedLoop.
- In the "Firmware File" section click "Select..." and select the firmware file to upload. It should be named like "Motorcontroller_V3_12_00.fw". Select the file with the newest version number.
- In the "Parameters" section check "Create Backup" to create a backup of the firmware parameters before the update. Select "Keep old parameters" to keep the current parameters. Alternatively you can select "New from file" and select a firmware parameter file for one or all axes.
- In section "Write to Device" click "Select..." and select the axes to update. If you need to update multiple axes you can test updating one first and do the others later.
- Double check all settings and make sure the emergency stop is pressed.
- Click "Write to Modules", follow the instructions if any occur and wait until ModuleCtrl shows a message saying the update is done. This will take 3-4 minutes per axis. Do not turn off the power or disconnect while ModuleCtrl is working!
- Once the update is finished restart the robot.
Test the robot
After the firmware update succeeded you can test the robot. Release the emergency stop but keep it nearby in case the robot moves unexpectedly. Connect iRC/CPRog, enable the axes and use the jog buttons with a low velocity override to slowly move all axes. After confirming that all axes move you can test referencing the robot (not necessary for Rebel joints).


